Professional Medical Necessity Inclusion Maintenance |
Contents Previous Next |
To begin configuring your professional medical necessity inclusions, from the ClaimStaker toolbar, select Configuration, then Medical Necessity Inclusion Maintenance, then Professional.
The Professional Medical Necessity Inclusion Maintenance page displays with a list of any inclusions you have already created. To make locating an inclusion easier, they can be sorted by CPT code, modifier, ICD code, ICD type, or by edit message by selecting the link on the appropriate column header.
REMINDER: Working payers must have been previously added via the Payer Maintenance page in order to be available on the Professional Medical Necessity Inclusion Maintenance page. Otherwise, the "All Payers, Commercial or Otherwise" option will be the only option available in the working payer drop-down menu.
To view inclusions created for all payers, select All Payers, Commercial or Otherwise from the Working Payer drop-down menu. To view medical necessity inclusions for a specific payer, select the desired payer from the Working Payer drop-down menu. Select the Get Inclusions button. If no medical necessity inclusions have been created for a working payer, there will be a message stating, "No inclusions have been created for this working payer."
![]()
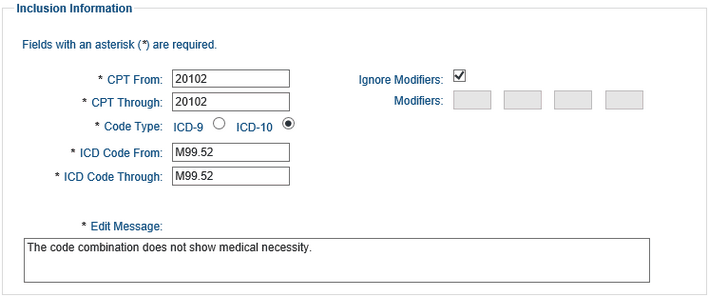
To add a new professional medical necessity inclusion, select the Add button on the Professional Medical Necessity Inclusion Maintenance page. This opens the Add Professional Medical Necessity Inclusion page.
In order for the inclusion addition to be successful, please remember the following tips when entering a medical necessity inclusion:
To add an inclusion:
Your new medical necessity inclusion now appears in your list of inclusions.
Changes to medical necessity inclusions are made from the Professional Medical Necessity Inclusion Maintenance page. To make locating an inclusion easier, they may be sorted by CPT code, modifier, ICD code, ICD type, or by edit message by selecting the link on the appropriate column header. Once you locate the inclusion to modify, select the icon under the Edit column for that inclusion.

Selecting the Edit icon takes you to the Modify Professional Medical Necessity Inclusion page where you can make changes to the inclusion. Simply enter the necessary modifications and select the Apply button to save your changes and return to the Professional Medical Inclusion Maintenance page.
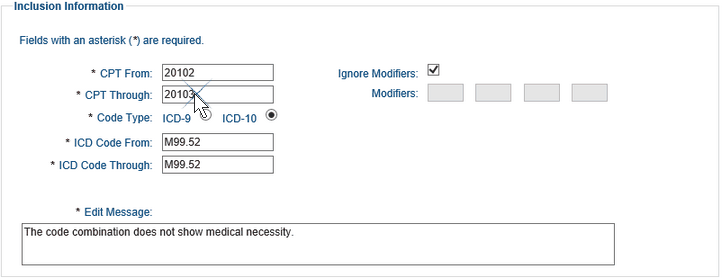
You are presented with a message stating the update was successful.
To delete a medical necessity inclusion, simply select the icon for the inclusion under the Delete column on the Professional Medical Necessity Inclusion Maintenance page.

You are presented with a message that the deletion was successful and the inclusion is removed from the list.
Copyright © 2022 Alpha II, LLC. All Rights Reserved. Contains Alpha II, LLC, Confidential and Proprietary Information.
UB-04 Data Specifications, 2022, is Copyrighted by American Hospital Association (AHA). All Rights Reserved.
CPT Copyright 2021 American Medical Association (AMA). All Rights Reserved. CPT® is a Registered Trademark of the AMA.